19 Things You May Not Know About Our My Acrylix® Stamps
Think you know everything about our exclusive My Acrylix® stamps? Put your knowledge to the test by reading the list below!
1. We have French and Spanish stamp sets.
2. If you see a stamp image outlined in red, that means it coordinates with one of the shapes from our Cricut® collections. If it’s outlined in blue, that means it coordinates with one of our Thin Cuts dies.
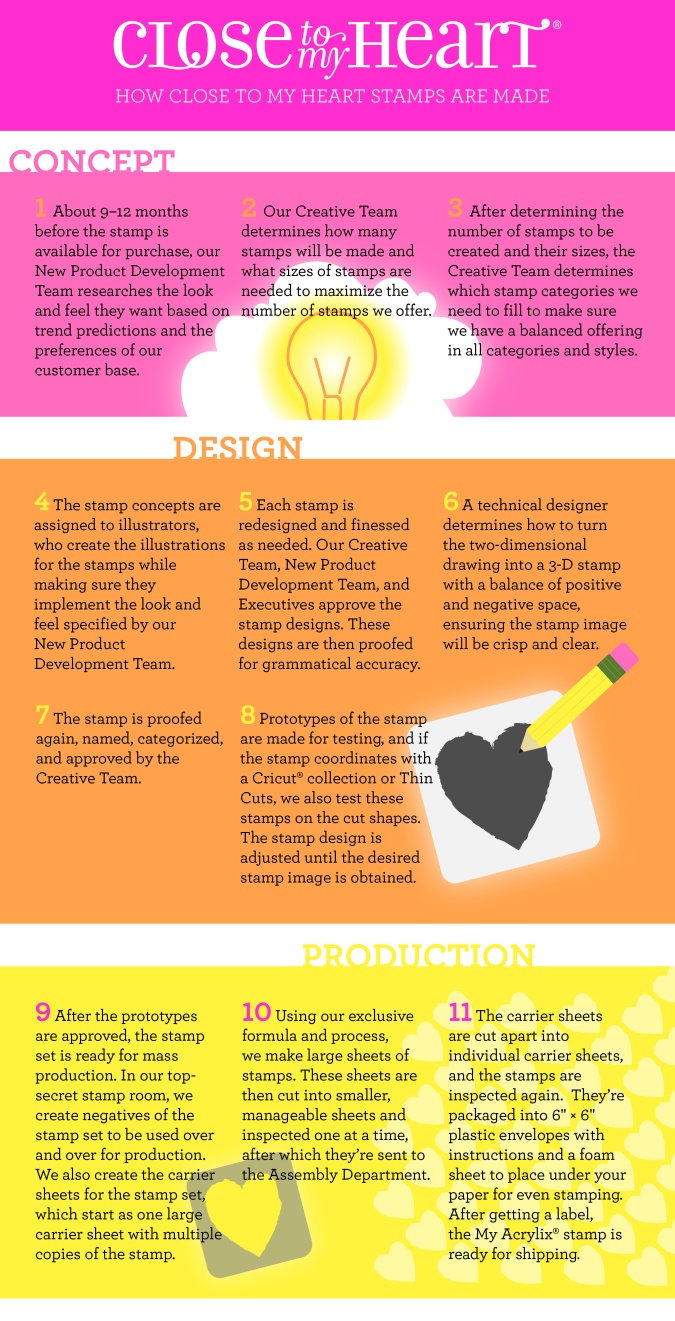
3. We put A LOT of thought and effort into making the best stamps for our customers. See the entire process in this infographic:
4. After we design each paper packet, we create two coordinating stamp sets, one for scrapbooking and one for cardmaking, to be paired with that specific paper. These two stamp sets can be found in the idea book right behind the coordinating Workshops Your Way™ scrapbooking kits.
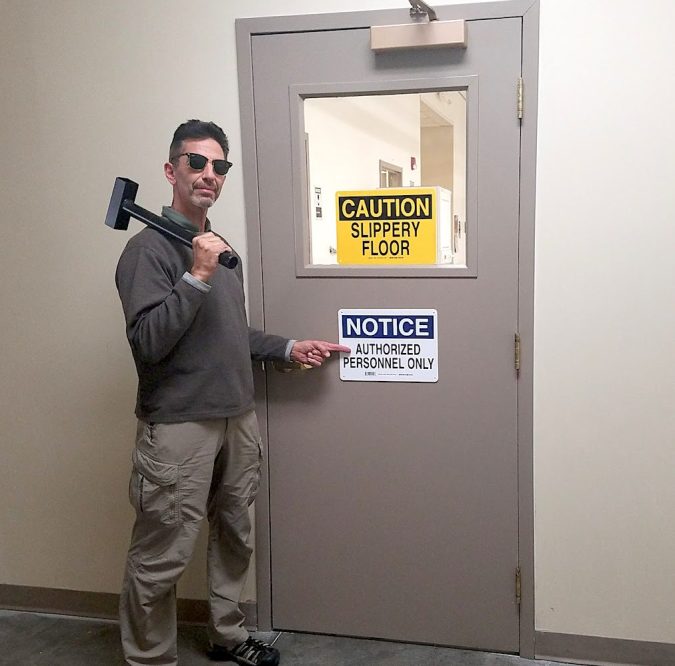
5. Our stamps are made right here at the Home Office, in a top-secret room.
6. It takes about one hour to make one sheet of stamps from start to finish.
7. New stamps work best when you “season” them. To do so, rub the stamp across a stamp pad, and then stamp onto scrap paper until the image is even.
8. Our stamps can be used with all sorts of inks, including dye, pigment, solvent, and alcohol inks.
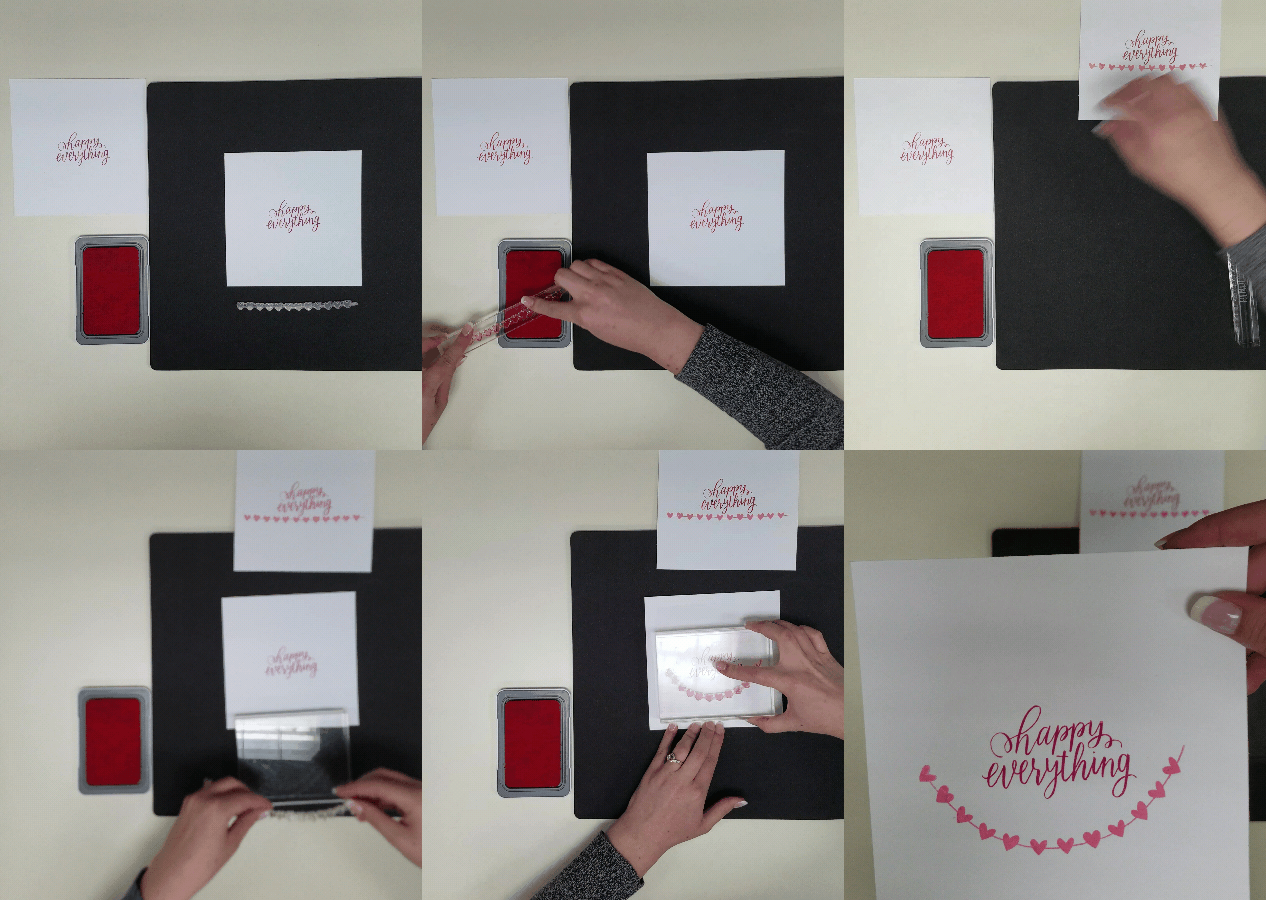
9. Rather than attaching your stamps to your blocks, try using your blocks to pick up your stamps from a flat surface. This way, the stamp will hold its natural shape.
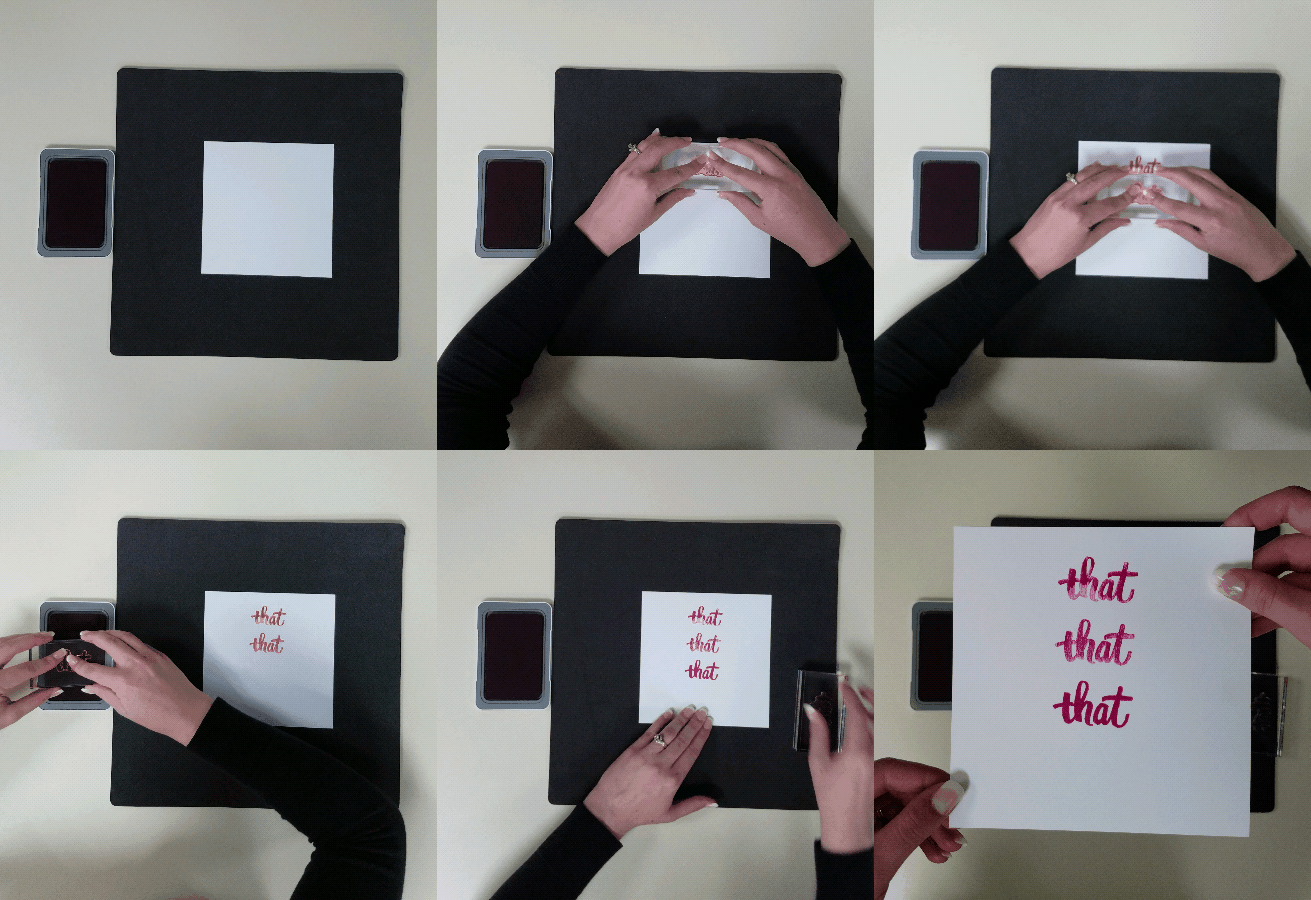
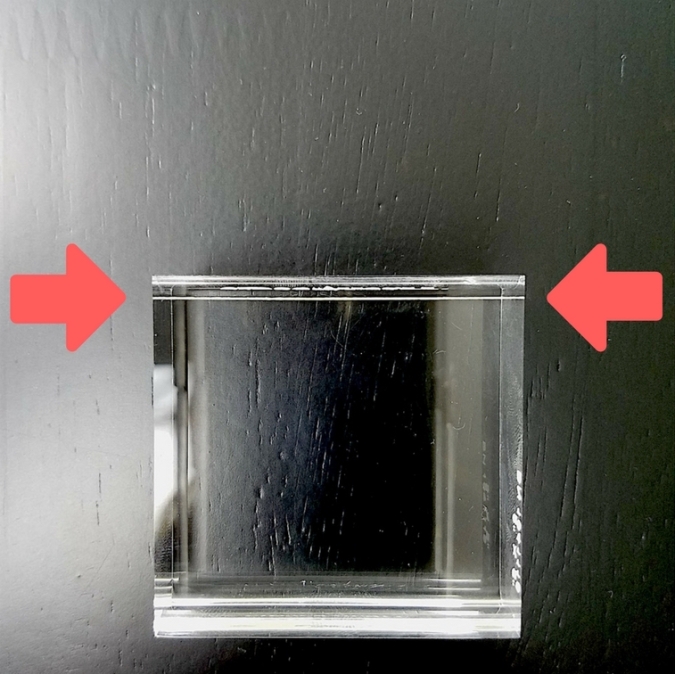
10. Our My Acrylix® blocks have a small white horizontal line on them to help you with stamp placement, which is especially helpful for keeping words and borders straight.
11. Some people cut apart their stamps in order to rearrange words in a sentiment when sticking them to their blocks.
12. Our stamps are flexible! Manipulate them so they fit inside shapes and banners, or just to get a different look!
14. Because our stamps and blocks are clear, you can easily stamp over the image again to get a richer, deeper image.
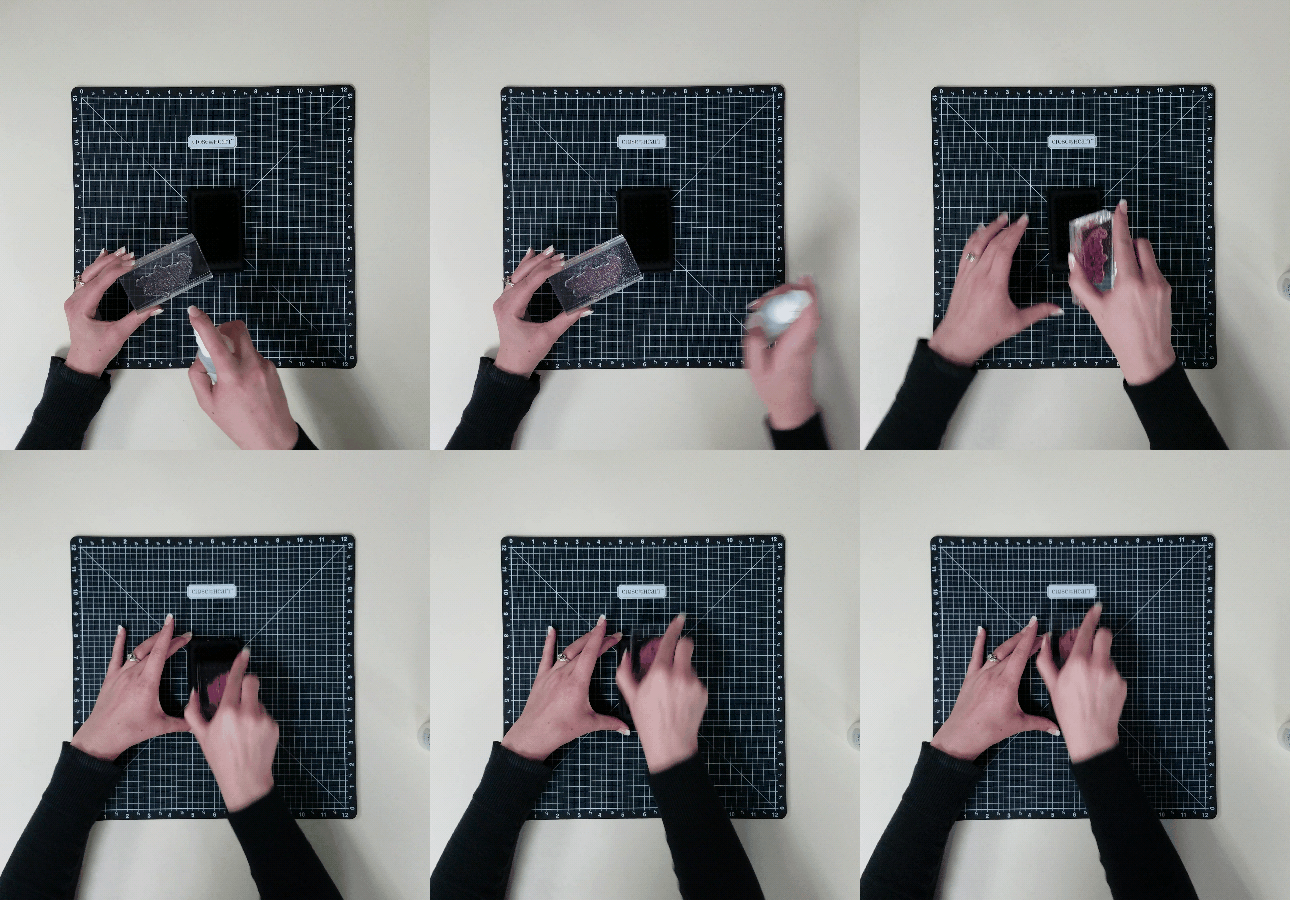
15. If you’re looking to remove that stubborn pigment ink, try our Spritz Cleaner and Stamp Scrubber. It makes it easy!
16. Our stamps don’t need to tan—they like being transparent, so keep them out of the sun!

17. Our stamps come in handy envelopes, which fit into our My Acrylix® organizer. You can also use our large organizer and tabs to store even more stamps. We also have a mini organizer for those mini stamp envelopes.
18. If your stamps ever start to lose their stickiness, all you need to do is rinse them with warm water and soap, and the stickiness will come right back. You can also use StazOn™ cleaner on the smooth side of the stamp.
19. Some stamps make great friends, like our good ol’ friend, Sticky Boy!
1. We have French and Spanish stamp sets.
2. If you see a stamp image outlined in red, that means it coordinates with one of the shapes from our Cricut® collections. If it’s outlined in blue, that means it coordinates with one of our Thin Cuts dies.
3. We put A LOT of thought and effort into making the best stamps for our customers. See the entire process in this infographic:
4. After we design each paper packet, we create two coordinating stamp sets, one for scrapbooking and one for cardmaking, to be paired with that specific paper. These two stamp sets can be found in the idea book right behind the coordinating Workshops Your Way™ scrapbooking kits.
5. Our stamps are made right here at the Home Office, in a top-secret room.
6. It takes about one hour to make one sheet of stamps from start to finish.
7. New stamps work best when you “season” them. To do so, rub the stamp across a stamp pad, and then stamp onto scrap paper until the image is even.
8. Our stamps can be used with all sorts of inks, including dye, pigment, solvent, and alcohol inks.
9. Rather than attaching your stamps to your blocks, try using your blocks to pick up your stamps from a flat surface. This way, the stamp will hold its natural shape.
10. Our My Acrylix® blocks have a small white horizontal line on them to help you with stamp placement, which is especially helpful for keeping words and borders straight.
11. Some people cut apart their stamps in order to rearrange words in a sentiment when sticking them to their blocks.
12. Our stamps are flexible! Manipulate them so they fit inside shapes and banners, or just to get a different look!
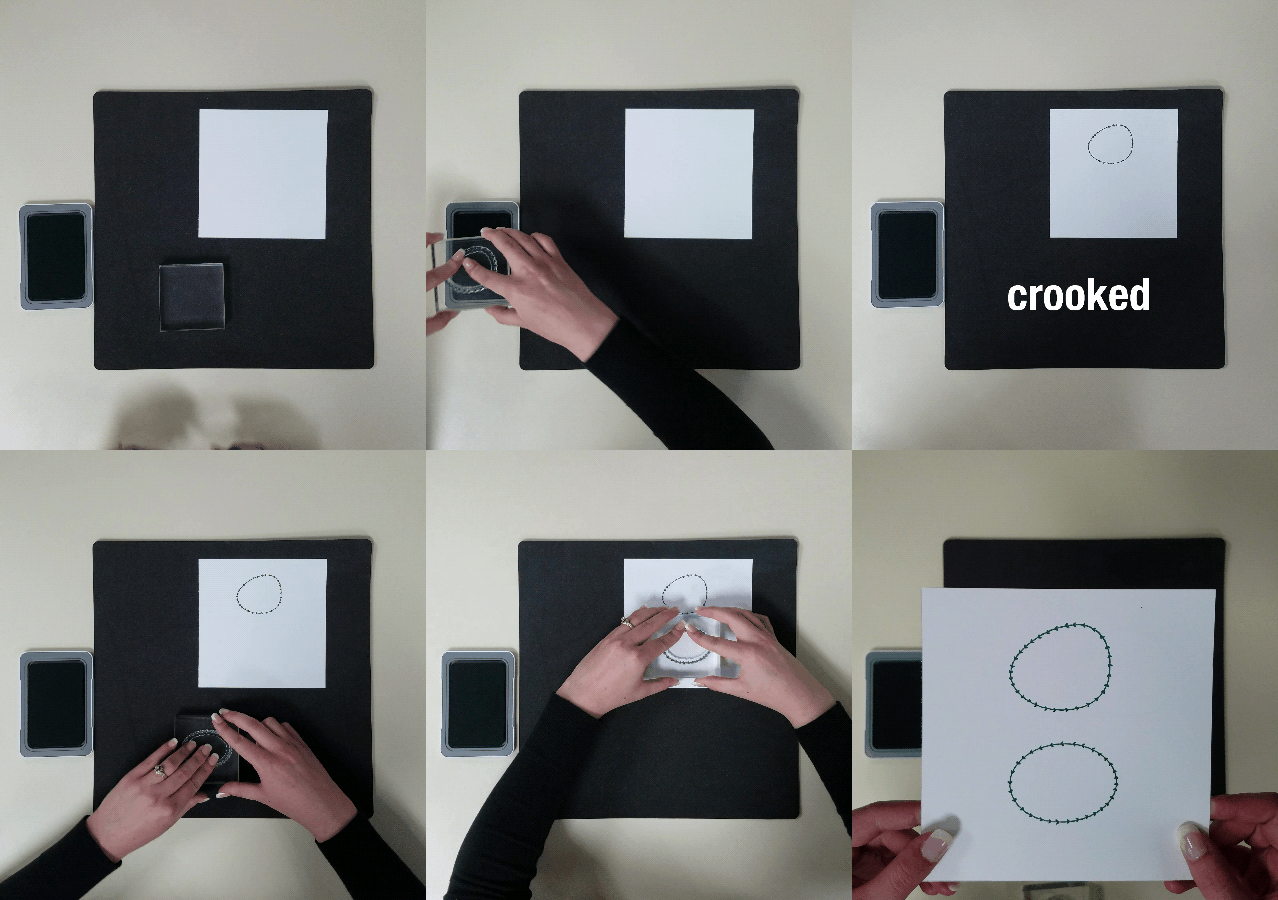
13. If some of your ink doesn’t transfer when stamping, quickly breathe over the stamp to re-moisten the remaining ink and then stamp over the image again. The missing portion usually blends into the existing image if the ink isn’t too dry. This is called the Huffing or Stamp Over Technique.
15. If you’re looking to remove that stubborn pigment ink, try our Spritz Cleaner and Stamp Scrubber. It makes it easy!
16. Our stamps don’t need to tan—they like being transparent, so keep them out of the sun!

17. Our stamps come in handy envelopes, which fit into our My Acrylix® organizer. You can also use our large organizer and tabs to store even more stamps. We also have a mini organizer for those mini stamp envelopes.
18. If your stamps ever start to lose their stickiness, all you need to do is rinse them with warm water and soap, and the stickiness will come right back. You can also use StazOn™ cleaner on the smooth side of the stamp.
19. Some stamps make great friends, like our good ol’ friend, Sticky Boy!





No comments:
Post a Comment